

I had a great question from one of my blog readers recently having to do with applying retention on old content being migrated into SharePoint Online and the best way to set up Microsoft 365 retention labels to do it.
Reader’s question paraphrased: I have migrated a number of documents from a non-SharePoint container into document libraries in SharePoint Online. These libraries have been configured to use document sets with a calendar year complete as a piece of metadata (2000, 2001, 2002, etc.), since we need our retention periods to start from that point. Can I use a retention label to retain for 20 years from the “Calendar Year Complete” metadata column across all migrated libraries automatically? Example: if the document set had a “Calendar Year complete” of 2012, it’s already ten years into its retention (because it’s currently 2022) so I would only want it retained for an additional 10 years in SharePoint Online.
The answer is yes; however, there are a few options for doing this…
Option 1… if the created date is accurate and you are retaining the created date during the migration process, you could simply apply a retention label configured to retain for 20 years past created date on the migrated content. This would correctly set the retention period for all migrated content.
Option 2… if you don’t want it based on created date and/or you aren’t retaining the created date during the migration process, you can alternatively use an event-based retention label along with the calendar year metadata.
Option 2 requires any of: Microsoft 365 E5/A5/G5, Microsoft 365 E5/A5/G5/F5 Compliance and F5 Security & Compliance, Microsoft 365 Information Protection and Governance E5/A5/G5, and Office 365 E5/A5/G5 for end-users benefiting from the service (users with contribute access to the migrated libraries in this example)
Here’s the high-level steps for Option 2:
- Set up a tenant-level term set for Calendar Year
- Setup SharePoint site(s) to house migrated content (and migrate in content)
- Configure the search schema
- Create an event type and an event-based retention label:
- retain for 20 years, trigger a disposition review (optional), publish to site, default the label on library(s)
- Create backdated retention events for legacy content migrated in
- Wait for event date to be applied to all migrated content… retention is applied
- [Optional] Wait for disposition review to confirm retention period has been met for historical content
Refer to a post by Martin Lingstuyl here: Blimped | Working with Purview event-based retention using code where he explains how to create the event-based retention label and the event trigger all thru code!
Here’s the detailed proof this works… 🙂
STEP 1: Set up a tenant-level term set for Calendar Year (will represent Calendar Year Complete on the content) and ensure you include terms for all historical years being migrated in:

STEP 2: SharePoint site setup
In this example, I created a Microsoft 365 Group site instead of a standalone SharePoint site to demonstrate. I’m also demoing this within 1 Group site rather than many, the latter being more realistic in a migration scenario. Please know, this technique will work across many sites/Groups in your tenant as long as the metadata has been consistently applied.
Also, I’m showing how to do this using the document set feature in SharePoint since this is what the blog reader’s question was referring to; however, you could accomplish the same thing without document sets. As long as there is metadata identifying the calendar year on your content, this method will work.
In this case, the Document Set feature must be enabled prior to the migration:

Create a custom document set content type with a piece of metadata, Calendar Year, pointing to the above tenant-level term set (great use-case for the Content Type Hub by the way). Add to the library, ensure the Calendar Year column is shared to documents within the document set (document set advanced settings), add some sample content to simulate the migration, and set the Calendar Year metadata value:
STEP 3: Configure the search schema
To be able to start the retention event on past years for migrated content, we need to be able to correctly identify it based on its Calendar Year property. We do this via the SharePoint search schema and mapping an available RefinableString managed property (RefinableString02 in this example) to the crawled property generated from the Calendar Year metadata column on the migrated document libraries, ows_CalendarYear. This only needs to be done once and can then apply to all migrated years’ content.

This mapping allows us to use RefinableString02 in the search query for the retention event. For example, RefinableString02:2000 for the 2000 calendar year.
STEP 4: Create a Calendar Year-end event type and a retention label
We need to create an event type to identify the Calendar Year-end event since this is what will drive the start of the retention period. The event type is a way to categorize different events across your tenant and on its own doesn’t do anything. Only when it’s been associated to retention labels will it come to life.
In this example, I’ve created an event-based retention label called Sample Label to retain for 20 years and associated it to the Calendar Year-end event. I’ve added a single stage disposition review once the retention period has come to an end (optional) and published the label to the migrated content locations, a Microsoft 365 Group site in this demo. I’ve then defaulted the retention label on all migration library(s).

Publish the above label to the Microsoft 365 Group:

Ensure the retention label is set as default on the document library.
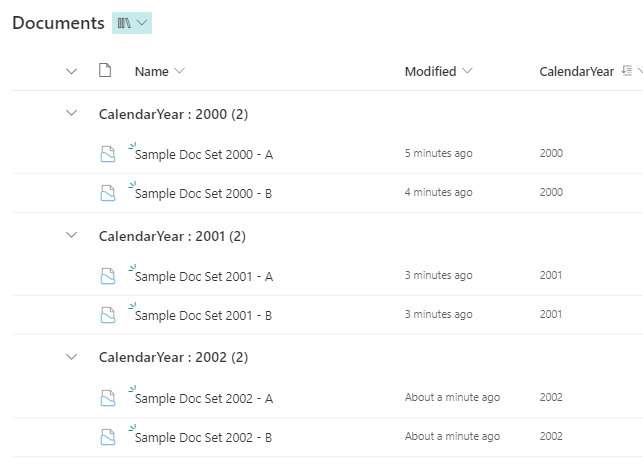
Here’s what the documents within one of the document sets looks like:

STEP 5: Create 3 backdated retention events
After the legacy content has been migrated in with the Calendar Year and retention label set, it’s time to start retention on it.
In our example, we migrated in calendar years 2000, 2001, and 2002 so we need to trigger 3 backdated events to align with those dates to start the 20-year retention on that calendar year. Examples:
- Content with a Calendar Year Complete of 2000… backdate the retention event to Jan. 1, 2001
- Content with a Calendar Year Complete of 2001… backdate the retention event to Jan. 1, 2002
- Content with a Calendar Year Complete of 2002… backdate the retention event to Jan. 1, 2003
Below is an example of the event trigger for the first bullet above, content tagged with a Calendar Year of 2000:

Here’s a summary of the 3 events created for the 3 years of migrated content:

Note: the time of this blogpost writing is April 2022 so all 3 of the above examples will be at different stages of their retention:
- Content with a Calendar Year Complete of 2000 is 2 years past the 20-year retention period
- Content with a Calendar Year Complete of 2001 is 1 year past the 20-year retention period
- Content with a Calendar Year Complete of 2002 is not yet past the 20-year retention period
STEP 6: Wait for event date to be applied to all content
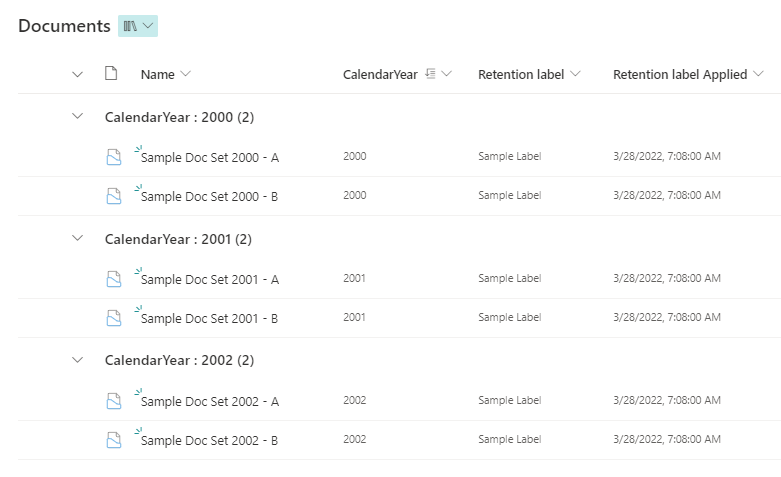
Once the retention engine (my word, not Microsoft’s) has had a chance to reason over the content looking for a match to the query provided in the event trigger (Asset Id textbox above), you’ll see a column automatically added to the library called ‘Label Event Date’ matching the event date of your trigger (can take a few days). In this example, the event date of Jan. 1, 2001 is now applied to all content matching RefinableString02:2000:

STEP 7: Wait for disposition review (if you have it configured)
I intentionally configured a disposition review for this label to demonstrate the flow of content having met its retention duration. Up to 7 days after the Label Event Date appeared in the libraries, the dispositions for Calendar Years 2000 and 2001 appeared in the Pending disposition tab within Disposition. Because Calendar Year 2002 has not yet met its 20-year retention (will be met on Jan. 1, 2023), it does NOT yet appear in the Pending disposition tab.
In this example, I had 10 documents for the year 2000 and 10 documents for the year 2001 for a total of 20 documents:

Below is the details of a document from Calendar Year 2000:

Note: The Expiration Date on the disposition for calendar year 2000 above is December 27, 2020 and for calendar year 2001 is December 27, 2021. I can only assume it’s converting the ’20 year retention’ into a number of days since there are 5 leap days in that 20-year date range, it ends up expiring 5 days prior to Jan. 1. 🙂
From this point on, you can follow the regular disposition review process to action the item.
Well that’s it my friends… both of the options are possible; however one is significantly more complex to configure than the other. If you are retaining the Created date during the migration and the Create date accurately reflects the date you need to drive retention, then Option 1 is a sound choice. If this is not the case, then Option 2 is a scalable option for retroactively applying retention to tagged, migrated content.
Thanks for reading.
-JCK
“…significantly more complex” is right…:-) If we gave out “MIGGY” awards, you’d surely get one for this. Definitely one of the more difficult topics in information management…
Thank you Joanne – this is incredibly helpful. I work for a 25-year old regulatory body that is only just beginning its information management journey. Eventually I will be asked to apply retention rules to a ton of documents in SharePoint 2013 and SP Online. This is exactly the type of solution I expect to be using in the coming months!
Thank you so much for the information! As Aaron says above, incredibly helpful!