

I was recently asked by a customer if they could apply 1 retention label to all content on a SharePoint site regardless of how many libraries were on the site and without having to set the default label at the document library level, even as new libraries were created.
License required for all options in this post… as of Feb 2026, auto-applying a retention label requires any of these licenses for anyone with at least contribute access to the libraries you’re applying the label on:
- Microsoft 365 E5/A5/G5
- Microsoft Purview Suite/EDU/GOV/FLW and Microsoft Defender + Purview Suite FLW
- Microsoft 365 E5/A5/F5/G5 Information Protection and Governance
- Office 365 E5/A5/G5
I can think of a few scenarios why customers may want to do this… 2 for SharePoint, 1 for OneDrive:
SharePoint: End-users can create new libraries in SharePoint at any time if they are a member or owner of the site. As an administrator, you have to know the library exists to set a default retention label on it or rely on the site steward to set it. Auto-applying the label on all content on a site instead ensures any new libraries created will automatically have the label applied.
SharePoint: You may want to automatically apply retention labels on all content, but only AFTER an event occurs such as project completion or legal matter resolution. A retention label that starts retention on the labeled date makes sense for this scenario.
OneDrive: Retention labels you want automatically applied to all OneDrive files for a defined set of users such as those leaving an organization (leavers) or Executives. A user adaptive scope is often used to scope the set of targeted users in this scenario.
Special note for OneDrive: If you’re looking to apply retention labels on OneDrive site content, you don’t have to take into account many of the issues that a SharePoint site will bring that I discuss in this post such as new libraries, custom content types and site pages. However, all options I describe in this post except 1 will also work to label content in the built-in document library in OneDrive if the OneDrive account is “in scope”. There are a few important things to know about retention labels in OneDrive:
- You can’t see the retention label in the modern files view and you can’t add it as a column like you can in SharePoint – you must create a classic view and include the retention label as a column to see it (not reasonable) or use Purview eDiscovery search to find them.
- You can edit or remove the retention label from OneDrive in the modern view like SharePoint at a file or folder level; however, you cannot do it in bulk like you can in SharePoint
- Once retention labels have been applied to OneDrive content, you must pay attention to your “leaver process” and whether you delete the user from Entra and/or remove their OneDrive license. OneDrive sites will be automatically archived after the 93rd day if they don’t have a valid OneDrive license until the retention period has been met. If you ever need to access (reactivate) the archived OneDrive site (E.g., FOIA requests, DSRs), you would have to set up Azure PAYG and enable Microsoft 365 Archive to pay for archival storage the OneDrive site is using. Link: Manage unlicensed OneDrive user accounts
At first blush, retention label application on all content on a site may seem like a straightforward ask; however, the condition you use to apply the label is an important decision you must make. This post shows the technical “how to” options for the conditions as well as risks for each.
Before starting, a key point to understand is that once a retention label is applied to an item (manually, defaulted, or auto-applied), an auto-apply label policy will NEVER override it; even if the condition in the auto-apply label policy matches the labeled item.
This is a key difference between auto-applying a retention label and auto-applying a sensitivity label. A sensitivity label has a priority based on its position in the label schema that will allow a sensitivity label currently applied to an item to be overwritten if the auto-apply label is a higher priority in the schema and the current label hasn’t been manually applied. This same priority-based behavior simply does not exist for retention labels.
First retention label to apply to an item wins regardless of how it was applied.
To automatically apply a retention label to all unlabeled content if you don’t want to set a default label on the library, you must use an auto-apply retention label policy scoped to the site (either a static or adaptive scope) with a condition that will match all content.
Sounds simple enough, but you must be clear on what you want labeled. Do you only want content in document libraries labeled (most common)? What about list items? What about site pages? This matters when you’re building your query. For all options I provide in this post, I’ll state what content is labeled.
2 key points to know before labeling anything with an auto-apply label policy:
- Always run an auto-apply label policy in simulation mode first to preview results
- If you auto-apply a record retention label to all content (as opposed to a non-record label), proceed with caution. There will be no way to easily reverse (unlabel) this once the record label is applied.
For all options I describe below, when creating the auto-apply label policy, you select the second radio button to apply the label based on a property:
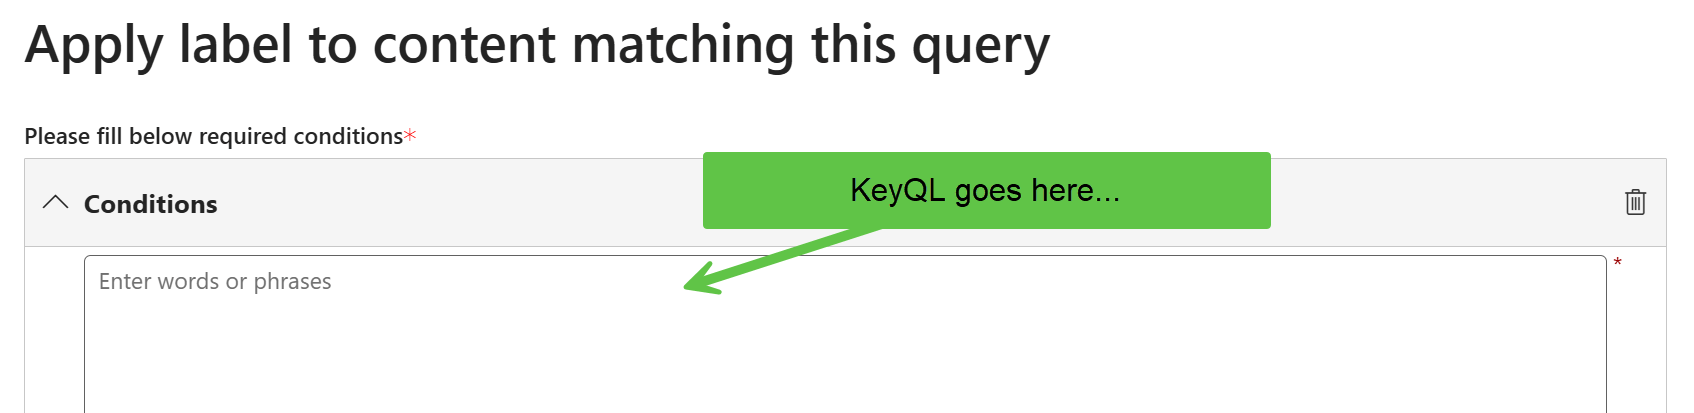
The next page shows where you enter your Keyword Query Language (KeyQL) query conditions to find matching content:
Below are the KeyQL conditions I’ve tested that you can use to apply a label to content on the site. All of the properties used are built-in from Microsoft and do not require any additional mapping in the search schema.
1️⃣ Option 1 – SPContentType
2️⃣ Option 2 – ContentTypeId
3️⃣ Option 3 – ParentLink
4️⃣ Option 4 – FileExtension
5️⃣ Option 5 – File size
1️⃣ Option 1 – SPContentType
KeyQL condition: SPContentType:Document
This labels all files with a matching content type of Document. I prefer to use the SPContentType property rather than ContentType because the ContentType property has the mime type in front of the content type name and the SPContentType property is the “friendly name” of the content type without the mime type. That said, please know that ContentType:Document would also work.
Check out my post for a detailed explanation: Content Type Filters for SharePoint Online
The good: Document is the default content type on all out-of-the-box document libraries (in SharePoint and in a user’s OneDrive).
The risks: This may be challenging if you don’t know if additional custom document content types have been added across your organization. You can specify a custom document content type in this condition as well, but you would have to know one was created before adding it to the KeyQL condition. This condition will apply the label to content in ALL document libraries on the site (including Site Assets and custom libraries) which you may not want. Refer to Option 3 to explicitly include and/or exclude a library.
What’s labeled: all Document content types in a site’s built-in document libraries (Shared documents, Site Assets) and any custom document libraries you’ve built.
Workloads: will work against both SharePoint and OneDrive
2️⃣ Option 2 – ContentTypeId
KeyQL condition: ContentTypeId:0x0101*
This labels all files with a matching content type Id and is my favourite.
The good: This will find a match on all content types in the library whether they use the default content type (Document) or a custom content type inheriting from the Document default. Since only content types that are either the Document content type itself or a custom content that inherits from the Document content type can exist in a library, all content will start with the same ContentTypeId of 0x0101. You must wildcard this value in the KeyQL condition to catch them all.
The risks: Will apply the label to content in ALL document libraries on the site (including Site Assets and all custom libraries) which you may not want. Refer to Option 3 to explicitly include and/or exclude a library.
What’s labeled: all Document content types and custom Document content types in all built-in document libraries (Shared documents, Site Assets) and custom document libraries on the site.
Workloads: will work against both SharePoint and OneDrive
3️⃣ Option 3 – ParentLink
KeyQL condition: ParentLink:”Shared Documents”
This labels all files in the default Shared Documents library in a site. (or whatever library name you enter in the condition)
You may be wondering… what happens if the display name of a custom library changes after it’s been created? It doesn’t matter. This query uses the internal name of the document library which is formed when the library is created and it can’t change after that even if the display name does change.
The good: If business users are working in a Microsoft Team, the likelihood of all their Teams’ files residing in the default Shared Documents library is very high. This query will apply the label to all content within the library named in the ParentLink property. Unlike the DocumentLink property, you only have to know the library’s internal name, not the full path to the document library. This is what makes the ParentLink far more flexible and scalable than the DocumentLink property, particularly for the default Shared Documents library.
You can also combine this option with other options to EXCLUDE specific libraries you don’t want to be labeled by putting NOT in front of the query:
NOT ParentLink:”Site Assets” NOT ParentLink:”Site pages”
The risks: If other libraries are created on the site, they won’t be labeled. (unless you also add them into the KeyQL condition such as:
ParentLink:”Shared Documents” OR ParentLink:”Custom library name”
What’s labeled: all content that is in the library name you specify in the ParentLink property. It will include content both at the root of the library as well as in subfolders.
Workloads: will work against SharePoint. (The default document library in OneDrive is called Documents; however, I would use one of the other options to apply a retention label to OneDrive content rather than the ParentLink property to be more specific)
4️⃣ Option 4 – FileExtension
KeyQL condition: FileExtension:docx OR FileExtension:pptx OR FileExtension:xlsx OR FileExtension:pdf
This labels all files with matching extensions in all libraries in the site.
The good: You can target specific file types; however, I rarely see this condition being used on its own. I sometimes see it if combined with other conditions (such as ParentLink).
You can combine this option with other options to exclude certain file extensions. For example, adding NOT FileExtension:aspx in the condition will ensure Site pages are not included.
The risks: You have to explicitly target file types and you might miss some you’re unaware of. It will also apply to all built-in and custom document libraries on the site. Refer to Option 3 to explicitly include and/or exclude a library.
What’s labeled: matching content for the file extensions you are including. This is across all libraries in the site (Shared Documents, custom document libraries, Site Assets, Site pages).
Workloads: will work against both SharePoint and OneDrive
5️⃣ Option 5 – File size
KeyQL condition: Size>0
This labels all files whose size is > 0.
The good: simple, catch-all query.
The risks: It’s a simple, catch-all query. 🙂 You may not want this. However, remember you can combine this with Option 3 to exclude any libraries you don’t want included such as:
Size>0 NOT ParentLink:”Site pages” NOT ParentLink:”Site Assets”
What’s labeled: This labels everything on the site (some exceptions for system content) including documents, items, Site pages, and Site assets.
Workloads: will work against both SharePoint and OneDrive
💭 Closing thoughts
Whether you agree with the initial customer ask of auto-applying a label to all content in a site or not is a topic for another conversation. I don’t see this being requested a lot in the field except where the customer has done a really good job at reducing their File Plan, they require a review on content prior to deletion (otherwise they could just use a retention policy), and it is appropriate to apply 1 retention label to all unlabeled content on a site. This is where your SharePoint site architecture and retention requirements meet head-on.
Is this better than just setting a default label on a library in a SharePoint site? It depends. The advantage of a default retention label is that it does allow you to change the default after its been applied to content which will also change the retention label on all files that had the label applied thru the default. Because of this, it does provide some flexibility that auto-applying doesn’t. However, there are some challenges around setting the default retention label such as: who will set it on your built-in and custom libraries? At what point in the provisioning process will this happen? The auto-apply label policy approach discussed in this post eliminates the need for anyone to know and remember to set the default, but it IS a hammer approach. 🔨
Before proceeding, it is critical to ensure anyone asking for this understands the downstream effects. The fact that the retention label cannot be overwritten once its been applied to a file is a very challenging design constraint and should cause anyone to pause before proceeding. If this is exactly what you are looking for, the conditions above will make it happen.
Thanks for reading.
-JCK
Joanne, I take it that automation such as this to autoapply a retention label requires an E5 licenseor is that old news?
My bad I didn’t spell that out. Yes, as of Feb 2026, auto-applying a retention label requires any of these license:
Hi Joanne, I wonder if it has any limitation like auto-application of sensitivity labels with limit maximum of 100,000 automatically labeled files in your tenant per day? if not, how fast is it then?
I’m not aware of any documented limit like sensitivity labels. I believe the official guidance on it is still it will take “up to 7 days” to be labeled. My experience is consistent with that.